

Table of Contents
Traditionally, people used paint rollers to paint a room or building. However, paint rollers can take up a huge chunk of your time and requires a lot of effort. Luckily, with the advancement of technology, paint sprayers with air compressors are a lot more efficient and effective at painting. But how do you use it? Well, to figure that out, keep on reading this article as we will cover most of the basics of how to use a paint sprayer with an air compressor.
What Is An Air Compressor Paint Sprayer?
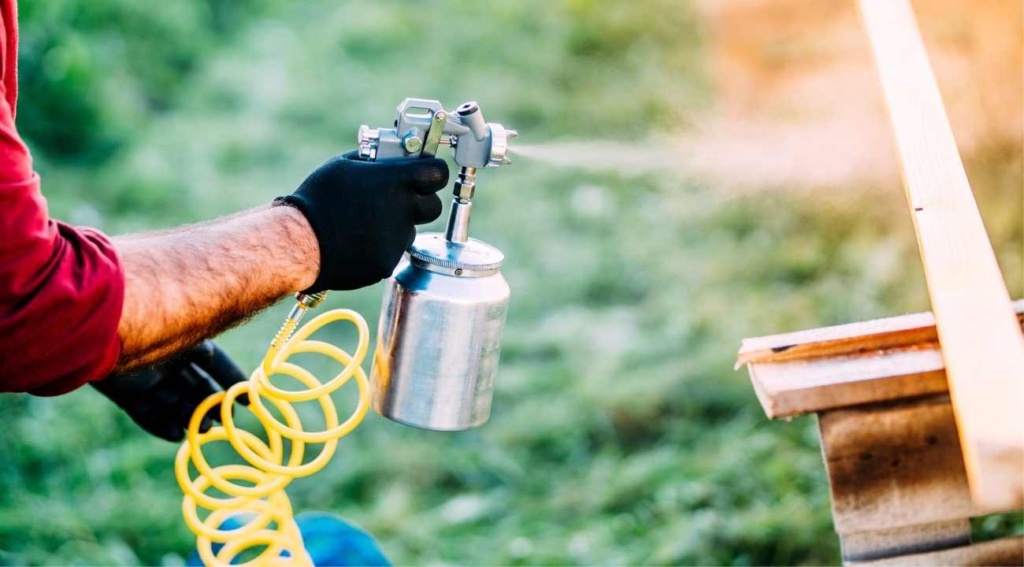
Before you get into how to use a paint sprayer with an air compressor, you first need to know what it is. For those who are not familiar, an air compressor paint sprayer uses compressed air to propel paint particles toward its target area, just like the name suggests.
These paint sprayers need a power source. Most of them run on electricity, however, there are a few models that use gasoline as well. The power source is required to create and store pressurized air inside a tank. This is connected to the air sprayer which atomizes and propels the paint through the sprayer nozzle.
The interesting fact about air compressors is that you can use any one of them as long as they have the correct pressure output. So, if you have a nail gun, power driver, impact wrench, etc. that uses an air compressor with your required pressure output, then you can simply attach that to your paint sprayer and use it like that.
How Do You Paint With An Air Sprayer?
Start By Selecting Your Tools And Painting Medium
First, choose a spray painter that will meet the needs of your project. Then, select an air compressor that is compatible with the spray painter. A lot of people make the mistake of picking out a compressor before selecting the paint sprayer, which is totally wrong. Prioritize finding the best sprayer first.
Next, depending on the job, you can find out what painting medium will be best. For instance, primers are great for bare surfaces like wood and metal, latex goes really well with walls and ceilings, and enamel coatings are excellent at protecting surfaces that take a lot of abuse like kitchen wares.
Prepare Everything And Get Ready
The first step is to prepare yourself. Make sure to wear protective gear like coveralls, masks, gloves, goggles, etc. when spray painting. Then prepare your work area by covering all of your furniture and electronics with either newspapers or old sheets of clothes to avoid getting paint all over them. After that, properly clean, wash, and dry the area where you will be applying the new coat of paint. You need to do this to wipe away any dirt or debris that may be present in that area, otherwise, the paint job will look uneven.
Most air compressor sprayers require you to use low-viscosity paints. That means before you start painting, you will need thin out the paint you are going to use. For instance, oil-based paints require mineral spirits, and water-based paints need more water to thin out. However, whether you will need to thin your paint or not depends on the sprayer you are using. Most of the time your sprayer will indicate the level of viscosity that it can support which you can find in the product chart. Combine that with a thinning cup and you will be able to find the optimum thinning consistency. Once you have determined the viscosity of the paint, load it into your sprayer gun.

And finally, you will need to prepare the air compressor and spray gun. If you are an absolute newbie and this is your first time painting with a compressor, then we suggest that you read the manual first. Then check to see if your spray gun is clean and remove any protective caps that you may find. While doing this, also check if the hose has any holes in it. If it does, then contact the store you got your spray gun from. Then connect the sprayer to the compressor, switch it on, and set the pressure level to the required power.
Test Spray
Most modern sprayers feature a flow control dial which you have to fully open for the gun to operate at max power. Then aim the sprayer at a practice target like a waste bin or a discarded cardboard box and fire by squeezing the trigger fully. At first, only air will come out, which will then be followed by a few uneven spurts of paint. Keep on holding on to the trigger until the paint flows out smoothly without any spluttering. As you keep spraying, turn down the control dial to the point where you get the optimum flow of paint.
Additionally, before you start painting, you also need to adjust the spray pattern. Typically, you will find a choice of three spray patterns: horizontal, vertical, and circular. Vertical patterns are mainly used for side-to-side movements when painting walls. Horizontal patterns are usually used for up-and-down movements when painting railings. Lastly, circular patterns are primarily used to provide final touch-ups and paint hard-to-reach corners.
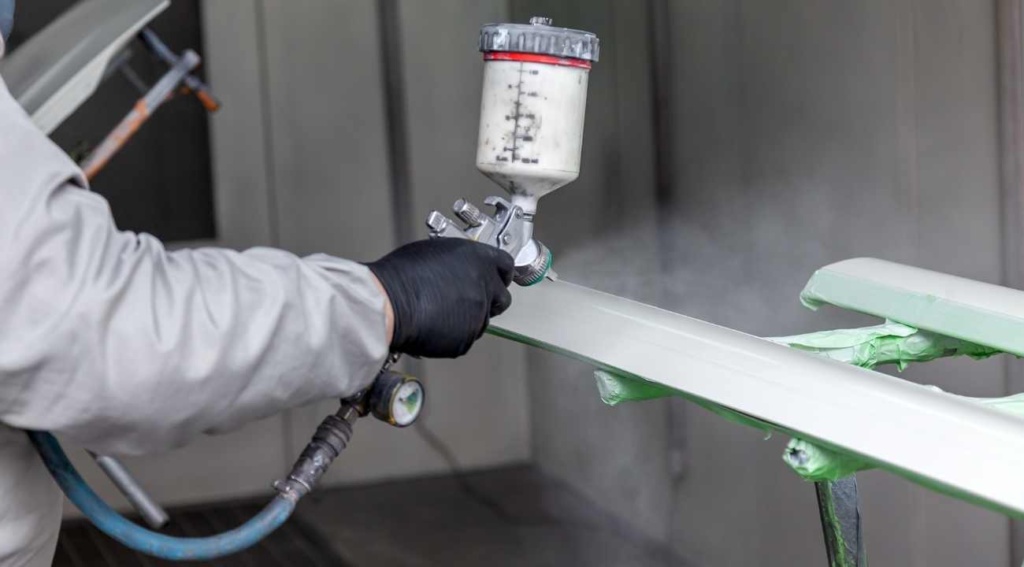
Spraying The Surface
- Hold the sprayer gun approximately seven to twelve inches away from your target area. When you are ready to paint, press the trigger.
- Move the gun along the surface of the area in a steady up-and-down or side-to-side motion.
- As you make each pass with the paint gun, you should also make sure that the passes slightly overlap each other so that the feathered edges get smoothed out.
- Keep an eye out for pooling or drips in your project. If you face this issue, simply turn down the paint delivery controls a little bit.
Finishing Up
- Once you have completed your job, it’s time to wrap things up. Start by turning off the compressor, disconnecting it from the air hose, and detaching the paint cup.
- If you have any unthinned paint, then you can return it to its original can. For diluted paint, you can store it in the gun container if you have a storage lid. If you don’t have a storage lid, then you can also cover it with Saran wrap.
- Then, clean the nozzle of the gun, cup, and siphon tube. Depending on the type of paint you used, you can flush out the system using some paint thinner or water. On a side note, if you are storing diluted paint in the cup, then keep it as it is.
Now you know the basics of how to use a paint sprayer with an air compressor. If you have noticed, the biggest portion of the how-to guide is the preparation section. That is because preparation is key when paint spraying. You need to make sure that your sprayer and target surface are all free from any sort of debris so that you can get the smoothest coating of paint. And if you are a beginner who needs more than just a guide to explain the process, then you can try consulting with other experienced DIYers about how they do it.


Leave a Comment