

Table of Contents
After completing a tiling project, comes the fun part of installing accessories, additional fixtures, shelves, and other fittings. Knowing how to drill tiles safely is essential to keep your exquisite and perfectly laid-out tiles intact.
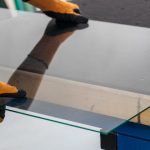
After layering the tiles on the floor or walls comes the tricky part where you have to drill through the tiles to mount stuff. We say that it is tricky because, with just one slip or wrong move, you’ll wind up with a cracked, unappealing tile. Drilling through tiles is more difficult than it appears since they are very sturdy but have low tensile strength, leaving them prone to shattering if not handled carefully.
However, with the appropriate equipment and techniques, you can drill through them without breaking them. Drilling through tiles is required if you want to mount things to the wall. So, you better master this skill, as you would be needing this a lot in your day-to-day life.
Types Of Tiles
To make sure you don’t shatter your tiles into pieces while drilling, you need to use the right equipment for each type of tile. There are mainly two types of tiles that you would be drilling into the ceramic tile and porcelain tile.
Ceramic Tile
Ceramic tiles are a combination of clays and other natural materials, that are mainly used in flooring material around your kitchen, bathroom, and all around your house. It’s a hard and brittle material, so it would be ideal to use specialized drilling bits for ceramic tile. Although you can work with any normal drill bits, a combination of carbide and steel drill bits would be preferable for drilling through ceramic tiles. And to make sure it doesn’t shatter, you need to drill with a moderate amount of pressure.
Porcelain Tile
Unlike ceramic tiles, porcelain tiles are much denser and more durable. Porcelain tiles are made from more refined clay and are crafted at very high temperatures. Thus, drilling through porcelain tiles is a bit trickier than drilling through ceramic ones. That’s why it’s recommended to use a diamond-tipped drill bit while making holes in porcelain tiles. Also, drilling at an angle while working with porcelain tiles always minimize the risk of them shattering.
Steps On How To Drill Into Tile Without Cracking?
Whether you’re a beginner or a professional, drilling through tiles without damaging them is quite a tough job. However, we have compiled a list of essential steps to teach you how to drill through the tile without breaking it.

1. Tile Material And Drill Bits
If you want to drill into tiles without shattering them, one of the first things you need to do is identify the types of tiles you’re working with. Certain tiles need a certain type of drill bits and can endure a specific drilling pressure. You would most likely break the tile if you don’t know what material you’re boring a hole into. For example, while working with ceramic tiles you can use almost any normal drill bit. But in the case of porcelain tiles, you need to use a very specific drill bit.
Porcelain tiles are a lot more hard and brittle, thus needing more preparation and work. While working with extra brittle materials you need to make sure your drill bits are capable of penetrating through hard surfaces. However, it’s recommended to use diamond-tipped drill bits or carbide-tipped masonry drill bits for drilling through hard materials like tiles.
2. Measure And Mark
While drilling tiles, you may face a problem where the drill bits slip around the surface, which can scratch or crack the tile. Drilling in the wrong spot can ruin the complete appearance of your tiling project, which you don’t want to do. Thus, you need to measure and mark the area with an X where you want to drill a hole. It’s not easy to mark the tiles, that’s why you need to put masking tape on that area. Masking tape also allows the drill bits to have surface traction.
Even after putting the masking tape, measure it again so you don’t drill a hole in the wrong place. When installing accessories with two mounting brackets, such as towel bars, use a level to ensure that both sets of holes are aligned. If you have a lot of holes to drill, you might want to make a miniature template out of a small piece of wood. Make a hole in the wood that’s the same size as the drill bit you’re going to use.
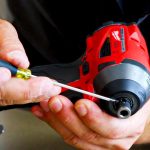
3. Pilot Hole
Once you’re done marking the masking tape, you can start drilling. The tiles are quite resistant to drilling, so initially, you cannot drill at a high speed. When drilling through hard materials like tiles, you can not rush through the process or you might risk shattering the tiles. If you start off at a high speed, then it will only cause overheating and unwanted vibration which will ultimately lead to damaging the surface material. Thus, you need to start drilling through the tiles at a very low to moderate speed. Penetrating the hard-glazed surface may take some time so you need to have some patience.
4. Keeping The Drill Bits Cool
Overheating of the bits and surface is one of the main reasons why tiles break while drilling. To keep the drill bit from overheating, you can use a small wet sponge to cool it down. Also, take regular breaks from drilling and immerse the drill bit in the water. Always make sure that there are no water or electrical lines underneath the tiles of the wall you’re drilling through.
Alternatively, you can also place a wet sponge beneath the drill bit while it is in operation to keep it from overheating and to capture any dust or debris that may fall during the drilling process. However, if you use either of these ways, be very cautious not to get the motorized component of the drill wet.
5. Changing The Drill Bits
Give yourself a pat on the back if you’ve cut through the hard glazed surface of the tile without causing any harm to it. Drill slowly and steadily to avoid blowing the wall apart. Your anchor will not hold correctly if the wall is blown away, and the accents will be free. At this stage, you can now switch the drill bits.
It’s a good idea to adjust the drill bit to the material of the surface to which your tiles are affixed. A regular drill bit, or even the one you used to drill the tile, may be used to drill through cement. By switching to a multi-material drill bit, you can avoid compromising the tile drill bit.
6. Speed Up
Now, when you’ll drill and insert the fixing plugs into the holes, they will sit flush and level with the tile, providing a secure fix and leaving you with a perfectly finished project. You can continue drilling into the hole after switching to the multi-material drill bit. You may now increase the drill’s speed while reducing the pressure. This will allow you to expand the hole into the drywall or backer board while causing the least amount of damage possible. After you’ve finished drilling, press the anchors into position and secure the hardware.
Ending Thoughts
Here are all the steps you need to follow to drill through the tile without breaking it. After following all these above steps carefully, you can have a sigh of relief as you have successfully drilled through tiles without causing any damage. Once you’re done drilling, remove the masking tape if you’ve used any and just clean out any debris or dirt from the surface of the tile with a wet cloth.


Leave a Comment